Ubuntu下怎么安装并配置VSCode编译C++
这篇文章主要介绍“Ubuntu下怎么安装并配置VS Code编译C++”的相关知识,小编通过实际案例向大家展示操作过程,操作方法简单快捷,实用性强,希望这篇“Ubuntu下怎么安装并配置VS Code编译C++”文章能帮助大家解决问题。
创新互联公司提供高防服务器、云服务器、香港服务器、德阳服务器托管等
ubuntu下安装并配置vs code编译c++
安装vs code
sudo add-apt-repository ppa:ubuntu-desktop/ubuntu-make
sudo apt-get update
sudo apt-get install ubuntu-make
sudo umake web visual-studio-code
然后按a直接默认同意就可以。
安装插件
打开vs code后,按crtl + shift + p调出命令行,然后搜索c++,安装微软自己开发的那个。
同样可以安装c++ intellisense插件,用于自动补全代码。
配置launch.json和tasks.json
注意vs code只能打开源码所在的文件夹,而不是直接打开源码文件,否则下面将无法进行!
打开源码所在文件夹后,在该文件夹中打开源码。按f5键,选择c++,
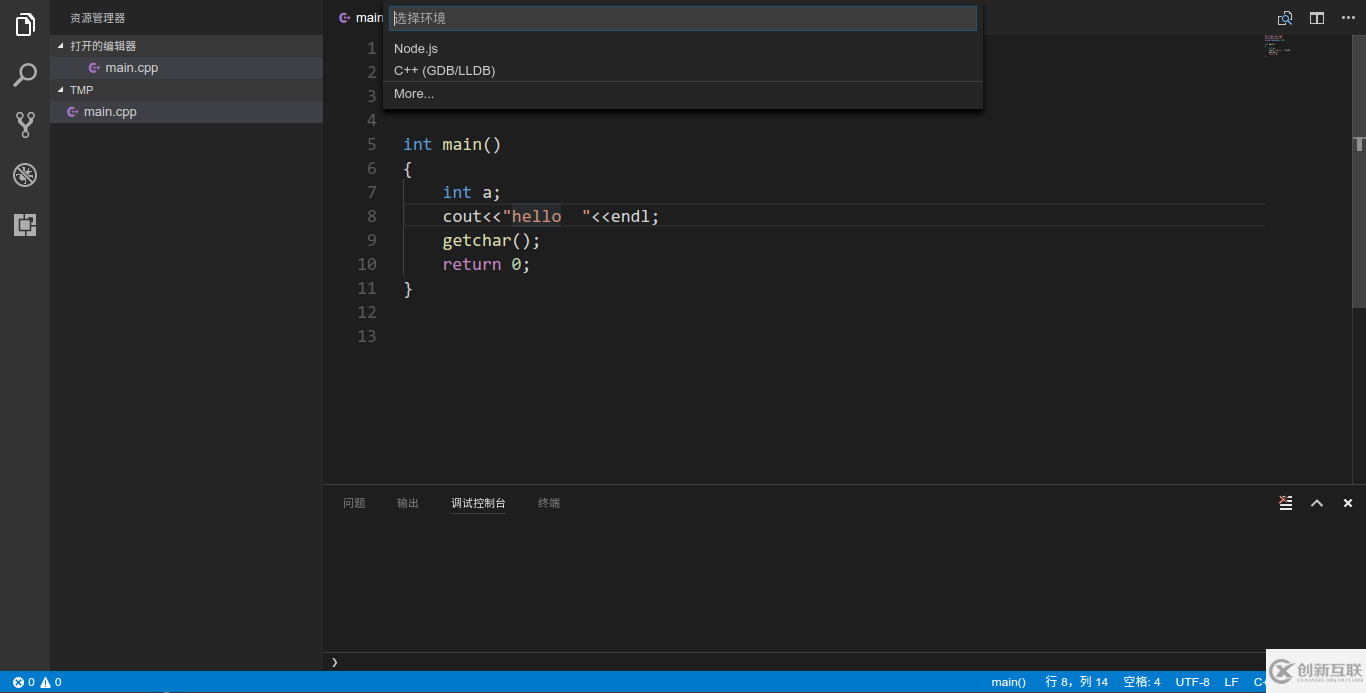
然后会自动生成launch.json文件,下面只需要修改两个地方
将
"program": "enter program name, for example \${workspaceroot}/a.out",改为
"program": "${workspaceroot}/a.out",将
"cwd": "\${workspaceroot}",改为
"cwd": "${workspaceroot}",完整的launch.json
{
  "version": "0.2.0",
  "configurations": [
    {
      "name": "(gdb) launch",
      "type": "cppdbg",
      "request": "launch",
      "program": "${workspaceroot}/a.out",
      "args": [],
      "stopatentry": false,
      "cwd": "${workspaceroot}",
      "environment": [],
      "externalconsole": true,
      "mimode": "gdb",
      "setupcommands": [
        {
          "description": "enable pretty-printing for gdb",
          "text": "-enable-pretty-printing",
          "ignorefailures": true
        }
      ]
    }
  ]
}
然后,调出命令行,输入task runner,选择others
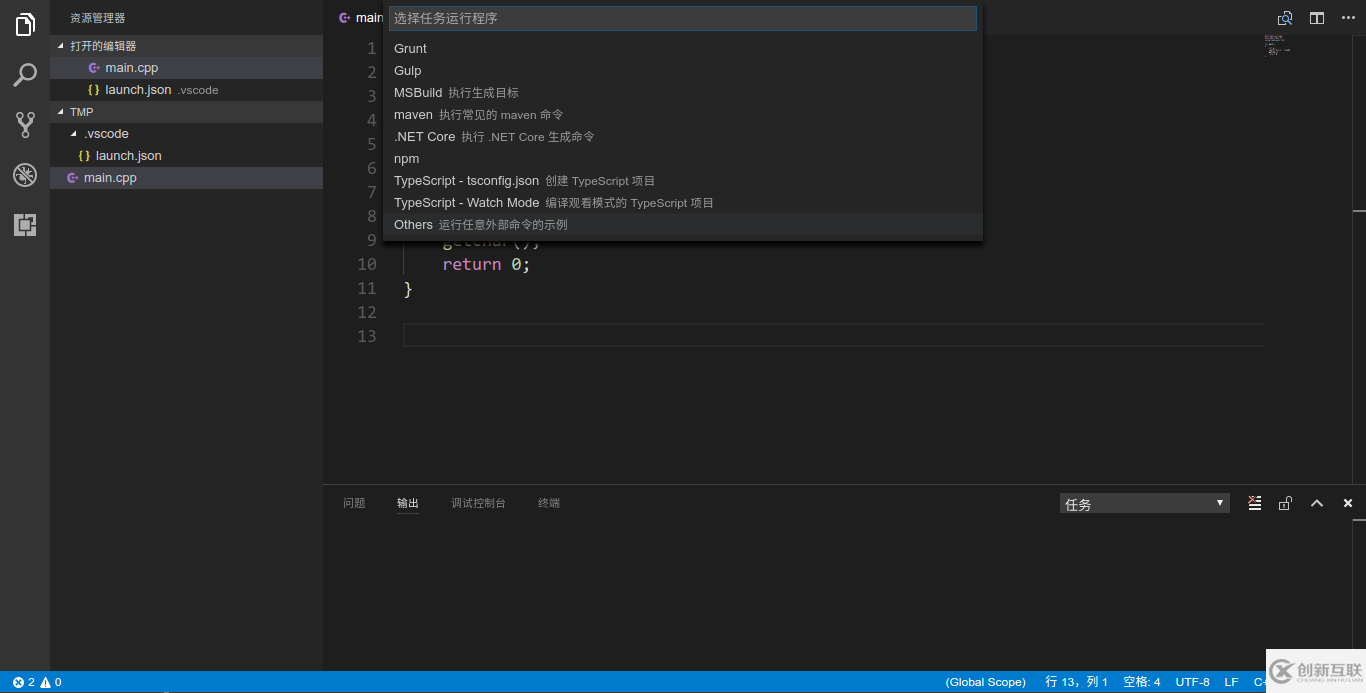
此时将自动生成tasks.json
将其中的
"command": "echo",
改为
"command": "g++",
将
"args": ["hello world"],
改为
"args": ["-g","${workspaceroot}/main.cpp"],注意这里的main.cpp要和你当前路径的源码名称一致。
完整的tasks.json
{
  // see https://go.microsoft.com/fwlink/?linkid=733558
  // for the documentation about the tasks.json format
  "version": "0.1.0",
  "command": "g++",
  "isshellcommand": true,
  "args": ["-g","${workspaceroot}/main.cpp"],
  "showoutput": "always"
}
运行测试
随便编写个代码
#include<iostream>
using namespace std;

int main()
{
  cout<<"hello vs code"<<endl;
  return 0;
}
按crtl + shift + b构建,按f5运行,发现终端一闪而过,什么都没有输出。于是考虑windows下的办法。
#include<iostream>
#include<stdlib.h>
using namespace std;

int main()
{
  cout<<"hello vs code"<<endl;
  system("pause");
  return 0;
}
同样并没有卵用。那就换一种方式。
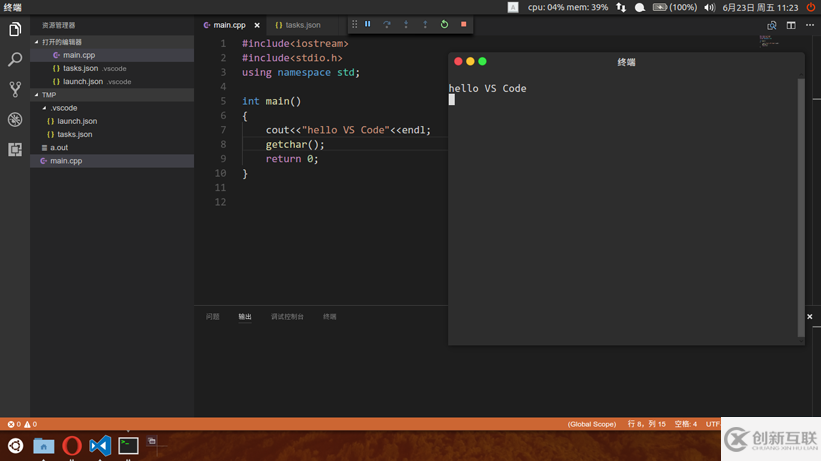
#include<iostream>
#include<stdio.h>
using namespace std;

int main()
{
  cout<<"hello vs code"<<endl;
  getchar();
  return 0;
}
按crtl + shift + b构建,按f5运行,程序完美输出。有图为证,哈哈
后记:
期间在终端里执行了以下操作
sudo apt-get install clang
如果提示clang有错可以运行该命令,安装clang。
关于“Ubuntu下怎么安装并配置VS Code编译C++”的内容就介绍到这里了,感谢大家的阅读。如果想了解更多行业相关的知识,可以关注创新互联行业资讯频道,小编每天都会为大家更新不同的知识点。
标题名称:Ubuntu下怎么安装并配置VSCode编译C++
分享路径:https://www.cdcxhl.com/article30/jiecpo.html
成都网站建设公司_创新互联,为您提供关键词优化、云服务器、全网营销推广、Google、商城网站、App开发
声明:本网站发布的内容(图片、视频和文字)以用户投稿、用户转载内容为主,如果涉及侵权请尽快告知,我们将会在第一时间删除。文章观点不代表本网站立场,如需处理请联系客服。电话:028-86922220;邮箱:631063699@qq.com。内容未经允许不得转载,或转载时需注明来源: 创新互联

- 外贸企业网站制作务需考虑的4大因素 2021-09-28
- 企业网站制作哪些栏目是必须要有的 2022-11-13
- 企业网站制作方案书都应该包含哪些内容? 2020-07-02
- 如何做好企业网站制作策划? 2022-06-16
- 企业网站制作需要注意什么? 2022-05-02
- 企业网站制作模板 2016-12-03
- 企业网站制作开发的前期工作要点是什么? 2022-09-26
- 企业网站制作的基本流程 2021-10-19
- 影响企业网站制作周期的四要素 2022-08-17
- 企业网站制作高质量的外链是这样做出来的 2021-11-16
- 高端腕表企业网站制作要点 2021-11-26
- 小型企业网站制作方案 2016-09-23