如何用Navigation管理Fragment-创新互联
如何用Navigation管理Fragment?针对这个问题,今天小编总结这篇有关使用Navigation的文章,希望能帮助更多想解决这个问题的朋友找到更加简单易行的办法。
创新互联公司专注于企业网络营销推广、网站重做改版、抚宁网站定制设计、自适应品牌网站建设、H5网站设计、商城开发、集团公司官网建设、成都外贸网站建设公司、高端网站制作、响应式网页设计等建站业务,价格优惠性价比高,为抚宁等各大城市提供网站开发制作服务。首先我们回顾一下Fragment的事务:
fragmentManager.beginTransaction().add(xxx).commit();如果是常见的多Tab切换Fragment,我们会在XML中使用FrameLayout作为Fragment的容器,然后创建Fragment实例,根据不同情况放入FrameLayout中:
<?xml version="1.0" encoding="utf-8"?>
<LinearLayout xmlns:android="http://schemas.android.com/apk/res/android"
   android:layout_width="match_parent"
   android:layout_height="match_parent"
   android:orientation="vertical">

   <FrameLayout
     android:id="@+id/container"
     android:layout_width="match_parent"
     android:layout_height="match_parent" />

</LinearLayout>
假设我们要阅读这份代码,坦白的说,你从这个xml可以得到的信息非常的少,你只能猜测这个页面可能是使用了Fragment仅此而已,然后再去找Java或Kotlin文件,具体查看FrameLayout都使用了哪些功能逻辑。
Navigation
现在我们用Navigation库,完成刚才的多Tab切换逻辑:
MainActivity的xml文件:

<?xml version="1.0" encoding="utf-8"?>
<androidx.constraintlayout.widget.ConstraintLayout xmlns:android="http://schemas.android.com/apk/res/android"
   xmlns:app="http://schemas.android.com/apk/res-auto"
   xmlns:tools="http://schemas.android.com/tools"
   android:layout_width="match_parent"
   android:layout_height="match_parent"
   tools:context=".MainActivity">

   <!-- fragment的集合 -->
   <fragment
     android:id="@+id/nav_host_fragment"
     android:name="androidx.navigation.fragment.NavHostFragment"
     android:layout_width="0dp"
     android:layout_height="0dp"
     app:layout_constraintLeft_toLeftOf="parent"
     app:layout_constraintRight_toRightOf="parent"
     app:layout_constraintTop_toTopOf="parent"
     app:layout_constraintBottom_toBottomOf="parent"
     app:defaultNavHost="true"
     app:navGraph="@navigation/nav_graph" />

</androidx.constraintlayout.widget.ConstraintLayout>
nav_graph文件:
<?xml version="1.0" encoding="utf-8"?>
<navigation xmlns:android="http://schemas.android.com/apk/res/android"
xmlns:app="http://schemas.android.com/apk/res-auto"
xmlns:tools="http://schemas.android.com/tools"
android:id="@+id/nav_graph"
app:startDestination="@id/mainFragment"> <!-- 开始的fragment -->
<fragment
android:id="@+id/mainFragment"
android:name="com.lzp.navigation.fragment.MainFragment"
android:label="main"
tools:layout="@layout/fragment_main" />
<fragment
android:id="@+id/secondFragment"
android:name="com.lzp.navigation.fragment.SecondFragment"
android:label="second"
tools:layout="@layout/fragment_sec" />
</navigation>从代码量上来看,确实是增加了,但是对应的xml中可以查看的信息增加了很多,从Activity的XML中我们把Fragment的使用区域封装成一个Fragment,而这个Fragment绑定了一个@navigation/nav_graph文件,在nav_graph中描述了我们将会使用到哪些Fragment。
Navigation的使用
从刚才我们的例子可以看出,Navigation的目标是把Fragment的维护移动到XML中,尽可能简化Fragment的使用复杂度,提高代码的可阅读性和维护性。你可以把Navigation的使用看成是一个高级的Include,只不过他的功能更加丰富和强大。
添加Gradle依赖
 dependencies {
    def nav_version = "2.1.0"

    // Java
    implementation "androidx.navigation:navigation-fragment:$nav_version"
    implementation "androidx.navigation:navigation-ui:$nav_version"

    // Kotlin
    implementation "androidx.navigation:navigation-fragment-ktx:$nav_version"
    implementation "androidx.navigation:navigation-ui-ktx:$nav_version"

   }
Google提供了Java和Kotlin两个版本。想要使用Navigation,必须要支持androidX,没有升级到androidX的朋友真的应该抓紧时间了。
使用NavHostFragment
<!-- fragment的集合 -->
   <fragment
     android:id="@+id/nav_host_fragment"
     android:name="androidx.navigation.fragment.NavHostFragment"
     android:layout_width="match_parent"
     android:layout_height="match_parent"
     app:defaultNavHost="true"
app:navGraph="@navigation/nav_graph" />把FrameLayout容器替换成NavHostFragment,app:navGraph="@navigation/nav_graph"是绑定对应的布局文件。@navigation只有在android studio 3.3以上版本才支持。
创建navGraph
在res文件加下创建navigation文件夹,在该文件夹下创建你需要的xml: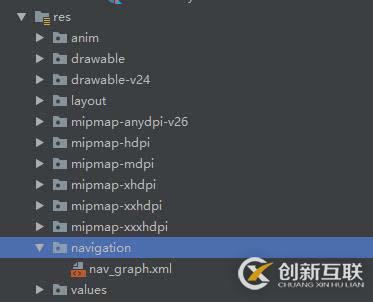
之前的Demo的XML代码:
<?xml version="1.0" encoding="utf-8"?>
<navigation xmlns:android="http://schemas.android.com/apk/res/android"
   xmlns:app="http://schemas.android.com/apk/res-auto"
   xmlns:tools="http://schemas.android.com/tools"
   android:id="@+id/nav_graph"
   app:startDestination="@id/mainFragment"> <!-- 开始的fragment -->

   <fragment
     android:id="@+id/mainFragment"
     android:name="com.lzp.navigation.fragment.MainFragment"
     android:label="main"
     tools:layout="@layout/fragment_main" />

   <fragment
     android:id="@+id/secondFragment"
     android:name="com.lzp.navigation.fragment.SecondFragment"
     android:label="second"
     tools:layout="@layout/fragment_sec" />

</navigation>我们将会使用两个Fragment,分别为MainFragment和SecondFragment,要为他们设置好id,因为Fragment的切换需要使用id。app:startDestination="@id/mainFragment"必须设置,指定默认添加的Fragment的id,如果不设置会直接崩溃。
切换Fragment
从MainFragment切换到SecondFragment:
val navHostController = Navigation.findNavController(activity, R.id.nav_host_fragment)
// 跳转到secondFragment
navHostController.navigate(R.id.secondFragment)
// 返回上一个Fragment
navHostController.navigateUp()
Navigation的更多用法
Navigation的使用就是这么简单,如果是Fragment非常熟悉的朋友,大体都能猜到Navigation是怎么做到的,这里就不做更多的分析了,接下来我们一起看看Navigation还提供了哪些便捷的方法。
Fragment的控制几乎都在NavController中。
动态设置NavGraph
val navController = Navigation.findNavController(this, R.id.nav_host_fragment)
// 与inflater类似,加载xml文件
val navGraph = navController.navInflater.inflate(R.navigation.nav_graph)
// 设置NavGraph,还有其他重载方法
navController.setGraph(navGraph, Bundle())
Fragment的切换动画
实现Fragment的切换动画有两种方法,第一种非常简单,直接在XML中写:
<fragment
     android:id="@+id/mainFragment"
     android:name="com.lzp.navigation.fragment.MainFragment"
     android:label="main"
     tools:layout="@layout/fragment_main">

     <action
       android:id="@+id/to_second"
       app:destination="@id/secondFragment"
       app:enterAnim="@anim/enter_anim"
       app:exitAnim="@anim/exit_anim"
       app:popEnterAnim="@anim/pop_enter_anim"
       app:popExitAnim="@anim/pop_exit_anim" />

   </fragment>
action可以自定义启动模式,启动动画等,id为必填项
app:enterAnim="@anim/enter_anim" // 进入页面的动画
app:exitAnim="@anim/exit_anim" // 退出的页面的动画
app:popEnterAnim="@anim/pop_enter_anim" // 点击返回或回到上一页时,上一个页面的进入动画
app:popExitAnim="@anim/pop_exit_anim" // 点击返回或回到上一页时,当前页面的退出动画
第二种,通过代码设置切换动画:
 navHostController.navigate(R.id.to_second, bundle, navOptions {
         anim {
           enter = R.anim.enter_anim
           exit = R.anim.exit_anim
           popEnter = R.anim.pop_enter_anim
           popExit = R.anim.pop_exit_anim
         }
})
重点是创建NavOption,他包含了跳转的各种动画,除了举例的方法外,还有很多其他重载的方法,这里就不做介绍了,大家可以自行查看。
Fragment的切换
Fragment的切换使用NavController的navigate()方法,他重载的方法非常多,在这里只介绍几个常用的方法。
- 第一种,通过Fragment的id跳转:
navHostController.navigate(R.id.secondFragment)请注意,这种跳转会直接忽略你设置的Action,直接显示对应id的Fragment。
- 第二种,通过Action的Id进行跳转
// 使用配置的action进行跳转
navHostController.navigate(R.id.to_second)
第三种,自定义NavDirections
// 自定义NavDirections
       navHostController.navigate(object : NavDirections {

         override fun getArguments(): Bundle = bundle

         override fun getActionId(): Int = R.id.to_second

 })
前两中也都有Bundle参数的跳转方法,在arguments中得到传递的参数。
监听Fragment切换
private val onDestinationChangedListener =
     NavController.OnDestinationChangedListener { _, destination, _ -> Log.e("lzp", destination.label.toString()) }
 val navHostController = Navigation.findNavController(this, R.id.nav_host_fragment)
 // 设置监听
 navHostController.addOnDestinationChangedListener(onDestinationChangedListener)
 // 移除监听
 navHostController.removeOnDestinationChangedListener(onDestinationChangedListener)
DeepLink
可以通过配置Uri的形式跳转:
<?xml version="1.0" encoding="utf-8"?>
<navigation xmlns:android="http://schemas.android.com/apk/res/android"
   xmlns:app="http://schemas.android.com/apk/res-auto"
   xmlns:tools="http://schemas.android.com/tools"
   android:id="@+id/nav_graph"
   app:startDestination="@id/mainFragment"> <!-- 开始的fragment -->

   ...

   <fragment
     android:id="@+id/secondFragment"
     android:name="com.lzp.navigation.fragment.SecondFragment"
     android:label="second"
     tools:layout="@layout/fragment_sec">

     <deepLink app:uri="lzp://main/second" />

   </fragment>

   <activity
     android:id="@+id/to_second_activity"
     android:name="com.lzp.navigation.SecondActivity">

     <deepLink app:uri="lzp://second/main" />

   </activity>

</navigation>

// 使用Uri进行DeepLinkt跳转
navHostController.navigate(Uri.parse("lzp://second/main"))
上文描述的就是用Navigation管理Fragment的方法,具体使用情况还需要大家自己动手实验使用过才能领会。如果想了解更多相关内容,欢迎关注创新互联行业资讯频道!
另外有需要云服务器可以了解下创新互联cdcxhl.cn,海内外云服务器15元起步,三天无理由+7*72小时售后在线,公司持有idc许可证,提供“云服务器、裸金属服务器、高防服务器、香港服务器、美国服务器、虚拟主机、免备案服务器”等云主机租用服务以及企业上云的综合解决方案,具有“安全稳定、简单易用、服务可用性高、性价比高”等特点与优势,专为企业上云打造定制,能够满足用户丰富、多元化的应用场景需求。
当前题目:如何用Navigation管理Fragment-创新互联
链接分享:https://www.cdcxhl.com/article8/ccsjop.html
成都网站建设公司_创新互联,为您提供网站维护、网站建设、微信小程序、网站改版、手机网站建设、用户体验
声明:本网站发布的内容(图片、视频和文字)以用户投稿、用户转载内容为主,如果涉及侵权请尽快告知,我们将会在第一时间删除。文章观点不代表本网站立场,如需处理请联系客服。电话:028-86922220;邮箱:631063699@qq.com。内容未经允许不得转载,或转载时需注明来源: 创新互联

- 网站标签优化之网页标签优化技巧 2014-03-25
- SEO标签优化,网站流量快速提升! 2023-04-04
- 成都网站建设有哪些标签优化是必要的? 2022-07-02
- 网站优化中细节:注意h1、h2、h3、strong标签优化 2021-07-26
- 网站标题title标签优化的重要性 2016-02-19
- 深圳做网站其他标签优化 2022-06-06
- 网站建设中SEO标签优化 2021-11-28
- 网站内页标签优化方法有哪些? 2023-04-30
- 网站标签优化需要注意的问题 2022-10-31
- 网站权重的提升不仅仅依靠首页流量还包括各个栏目页标签优化 2023-04-08
- SEO站内优化之Head标签优化 2021-12-26
- 网站TAG标签优化之路 2023-03-28