使用vue如何实现一个分页组功能
本文小编为大家详细介绍“使用vue如何实现一个分页组功能”,内容详细,步骤清晰,细节处理妥当,希望这篇“使用vue如何实现一个分页组功能”文章能帮助大家解决疑惑,下面跟着小编的思路慢慢深入,一起来学习新知识吧。
创新互联长期为超过千家客户提供的网站建设服务,团队从业经验10年,关注不同地域、不同群体,并针对不同对象提供差异化的产品和服务;打造开放共赢平台,与合作伙伴共同营造健康的互联网生态环境。为托克托企业提供专业的网站设计、成都网站设计,托克托网站改版等技术服务。拥有十多年丰富建站经验和众多成功案例,为您定制开发。
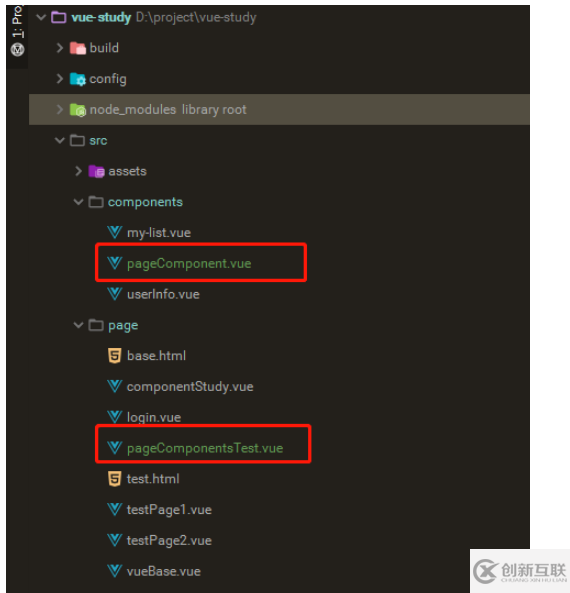
文件的目录:
我们在 pageComponentsTest.vue 页面引入了 pageComponent.vue 分页组件。整体思路是通过 props
来达到组件的灵活通用的效果,整体语法是使用vue的VM语法。
pageComponent.vue实现
首先实现一个分页,需要知道数据总条数,一个页面显示的数据条数和当前显示第几页的数据。那么我们在 pageComponent.vue 里面的 props 就有了。看下面的代码:
props: {
   // 分页配置
   pageConfig: {
    type: Object, require: true, default() {
     return {
      pageSize: 10,   //一页的数据条数
      pageNo: 0,    //当前页的索引
      total: 0,     //总的数据条数
      pageTotal: 0   //总的页数
     }
    }
   }
根据用户入参,我们可以使用计算属性来计算一个总页数的变量:
computed: {
   //计算总页数,如果传了pageTotal,直接取pageTotal的值,如果传了total,那么根据pageSize去计算
   pageTotal(){
    const config = this.pageConfig
    if(config.pageTotal){
     return config.pageTotal
    }else {
     if(config.pageSize && config.total){
      return Math.ceil(config.total/config.pageSize)
     }else {
      return 0
     }
    }
   }
  }
有了总页数,和当前页,就需要各种判断来实现我们的html部分了,这里分4中情况
总页数小于8,只需要直接遍历到8就行了。
总页数大于8,但当前页小于4的。
总页数大于8,当前页靠后的。
总页数大于8,当前页在中间的。
下面看具体的实现:
<!--上一页-->
   <button @click="prePage" :disabled="currentPage === 1">上一页</button>
   <!--总页数小于8的-->
   <template v-if="pageTotal <= showPageNo">
    <button v-for="i in pageTotal" @click="changeCurrentPage(i)" :class="{active:i === currentPage}" :key="i">{{i}}</button>
   </template>
   <template v-else-if="currentPage < 4">
    <button v-for="i in 6" @click="changeCurrentPage(i)" :class="{active:i === currentPage}" :key="i">{{i}}</button>
    <button :disabled="true">···</button>
    <button>{{pageTotal}}</button>
   </template>
   <template v-else-if="currentPage > pageTotal - 4">
    <button>1</button>
    <button :disabled="true">···</button>
    <button v-for="i in 6" @click="changeCurrentPage(i + (pageTotal - 6))" :class="{active:(i + (pageTotal - 6)) === currentPage}" :key="i">{{i + (pageTotal - 6)}}</button>
   </template>
   <template v-else>
    <button>1</button>
    <button :disabled="true">···</button>
    <button @click="changeCurrentPage(currentPage - 2)">{{currentPage - 2}}</button>
    <button @click="changeCurrentPage(currentPage - 1)">{{currentPage - 1}}</button>
    <button class="active">{{currentPage}}</button>
    <button @click="changeCurrentPage(currentPage + 1)">{{currentPage + 1}}</button>
    <button @click="changeCurrentPage(currentPage + 2)">{{currentPage + 2}}</button>
    <button :disabled="true">···</button>
    <button @click="changeCurrentPage(pageTotal)">{{pageTotal}}</button>
   </template>
   <!--下一页-->
   <button @click="nextPage" :disabled="currentPage === pageTotal">下一页</button>
可以看到页面上需要实现3个方法,分别是上下页,和点击页面的方法。
methods: {
   prePage(){
    this.currentPage -= 1
    this.$emit('changeCurrentPage',this.currentPage)
   },
   nextPage(){
    this.currentPage += 1
    this.$emit('changeCurrentPage',this.currentPage)
   },
   changeCurrentPage(i){
    this.currentPage = i
    this.$emit('changeCurrentPage',this.currentPage)
   }
  }
以上就是 pageComponent.vue 的大致实现了,每次页面改变,都会触发一个 changeCurrentPage 方法的回调,用来通知当前使用组件的页面当前页已经改变。
pageComponentsTest.vue的实现
引用页面就比较简单了,只要传入组件需要的对应的参数,就能显示我们的组件了。 引用部分:
<template>
 <div class="pageComponentsTest">
  <page-component :page-config="pageConfigTotal" @changeCurrentPage="changePage"></page-component>
  <page-component :page-config="pageConfigPageTotal"></page-component>
 </div>
</template>
配合入参部分:
{
  name: "pageComponentsTest",
  data() {
   return {
    pageConfigTotal:{total:21,pageSize:10,pageNo:1},
    pageConfigPageTotal:{total:21,pageSize:10,pageNo:1,pageTotal:50}
   }
  },
  components:{'page-component':pageComponent},
  methods: {
   changePage(page){
    this.pageConfigTotal.pageNo = page
   }
  }
 }
读到这里,这篇“使用vue如何实现一个分页组功能”文章已经介绍完毕,想要掌握这篇文章的知识点还需要大家自己动手实践使用过才能领会,如果想了解更多相关内容的文章,欢迎关注创新互联行业资讯频道。
当前文章:使用vue如何实现一个分页组功能
标题来源:https://www.cdcxhl.com/article14/gpjige.html
成都网站建设公司_创新互联,为您提供企业网站制作、关键词优化、用户体验、App设计、手机网站建设、定制网站
声明:本网站发布的内容(图片、视频和文字)以用户投稿、用户转载内容为主,如果涉及侵权请尽快告知,我们将会在第一时间删除。文章观点不代表本网站立场,如需处理请联系客服。电话:028-86922220;邮箱:631063699@qq.com。内容未经允许不得转载,或转载时需注明来源: 创新互联

- 外贸建站过程中 这些点你必须了解 2015-10-03
- 外贸建站没有你想的那么简单 2015-04-16
- 外贸建站需要哪些东西? 2014-07-23
- 外贸建站不得不说的秘密 2015-05-07
- 成都外贸建站公司哪家好? 2015-03-21
- 外贸建站前必看的四大技巧及优化系统 2022-05-27
- 外贸建站在租赁美国服务器时要注意什么? 2022-10-02
- 外贸建站完成后如何继续完善 2021-08-25
- 为什么要选择外贸建站? 2015-04-27
- 外贸建站推广怎么做效果最好? 2016-03-23
- 谈谈外贸建站为什么要选择香港服务器? 2022-10-03
- 第一节. 外贸建站前必须要了解的网站SEO优化知识 2016-03-02