windows中怎么使用Nginx搭建图片服务器
这篇“windows中怎么使用Nginx搭建图片服务器”文章的知识点大部分人都不太理解,所以小编给大家总结了以下内容,内容详细,步骤清晰,具有一定的借鉴价值,希望大家阅读完这篇文章能有所收获,下面我们一起来看看这篇“windows中怎么使用Nginx搭建图片服务器”文章吧。
在武胜等地区,都构建了全面的区域性战略布局,加强发展的系统性、市场前瞻性、产品创新能力,以专注、极致的服务理念,为客户提供成都网站制作、网站建设 网站设计制作按需网站开发,公司网站建设,企业网站建设,成都品牌网站建设,全网整合营销推广,成都外贸网站建设,武胜网站建设费用合理。
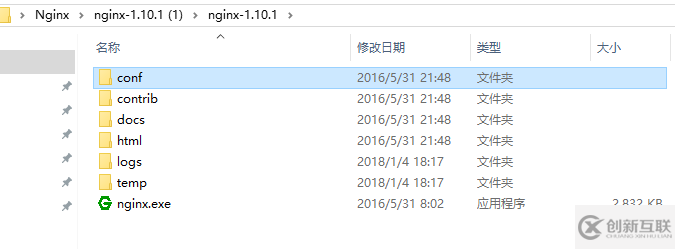
1.进入官网下载nginx压缩包,解压后目录如下
2.在解压后的conf/nginx.conf配置文件中,添加添加或者修改带有颜色地方的代码
#user nobody;
worker_processes 1;
#error_log logs/error.log;
#error_log logs/error.log notice;
#error_log logs/error.log info;
#pid logs/nginx.pid;
events {
worker_connections 1024;
}
http {
include mime.types;
default_type application/octet-stream;
#log_format main '$remote_addr - $remote_user [$time_local] "$request" '
# '$status $body_bytes_sent "$http_referer" '
# '"$http_user_agent" "$http_x_forwarded_for"';
#access_log logs/access.log main;
sendfile on;
#tcp_nopush on;
#keepalive_timeout 0;
keepalive_timeout 65;
#gzip on;
server {
listen 8089;
server_name localhost;
#charset utf-8;
#access_log logs/host.access.log main;
#添加博客的代码
location ~ .*\.(gif|jpg|jpeg|png)$ {
expires 24h;
root g:/images/;#指定图片存放路径
access_log g:/images/log;#图片路径
proxy_store on;
proxy_store_access user:rw group:rw all:rw;
proxy_temp_path g:/images/;#图片路径
proxy_redirect off;
proxy_set_header host 127.0.0.1;
proxy_set_header x-real-ip $remote_addr;
proxy_set_header x-forwarded-for $proxy_add_x_forwarded_for;
client_max_body_size 10m;
client_body_buffer_size 1280k;
proxy_connect_timeout 900;
proxy_send_timeout 900;
proxy_read_timeout 900;
proxy_buffer_size 40k;
proxy_buffers 40 320k;
proxy_busy_buffers_size 640k;
proxy_temp_file_write_size 640k;
if ( !-e $request_filename)
{
proxy_pass http://169.254.140.133:8089; #代理访问地址
}
}
location / {
root html;
index index.html index.htm;
}
#error_page 404 /404.html;
# redirect server error pages to the static page /50x.html
#
error_page 500 502 503 504 /50x.html;
location = /50x.html {
root html;
}
# proxy the php scripts to apache listening on 127.0.0.1:80
#
#location ~ \.php$ {
# proxy_pass http://127.0.0.1;
#}
# pass the php scripts to fastcgi server listening on 127.0.0.1:9000
#
#location ~ \.php$ {
# root html;
# fastcgi_pass 127.0.0.1:9000;
# fastcgi_index index.php;
# fastcgi_param script_filename /scripts$fastcgi_script_name;
# include fastcgi_params;
#}
# deny access to .htaccess files, if apache's document root
# concurs with nginx's one
#
#location ~ /\.ht {
# deny all;
#}
}
# another virtual host using mix of ip-, name-, and port-based configuration
#
#server {
# listen 8000;
# listen somename:8080;
# server_name somename alias another.alias;
# location / {
# root html;
# index index.html index.htm;
# }
#}
# https server
#
#server {
# listen 443 ssl;
# server_name localhost;
# ssl_certificate cert.pem;
# ssl_certificate_key cert.key;
# ssl_session_cache shared:ssl:1m;
# ssl_session_timeout 5m;
# ssl_ciphers high:!anull:!md5;
# ssl_prefer_server_ciphers on;
# location / {
# root html;
# index index.html index.htm;
# }
#}
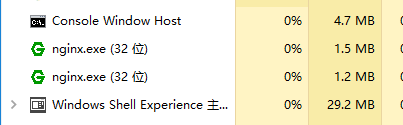
}3.点击绿色的nginx.exe图标,启动服务器,在任务管理器看到如下,则启动成功
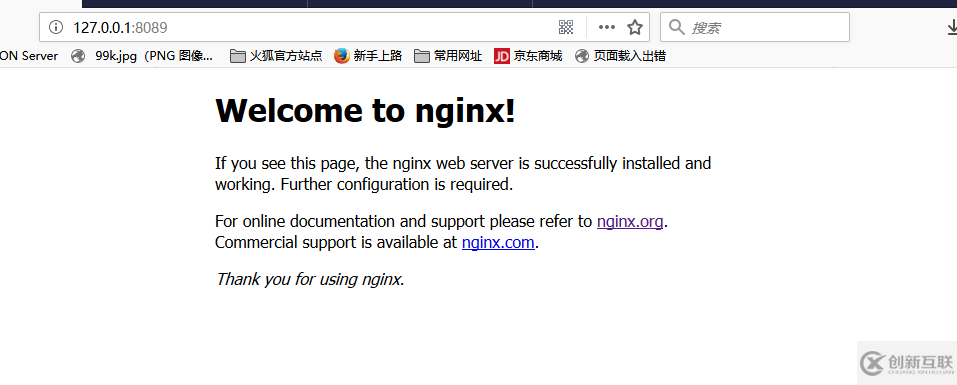
4.在浏览器中输入http://127.0.0.1:8089可以看到
5.在g:/images/下,放一个图片,在浏览器地址栏输入http://127.0.0.1:8089/img.jpg,就可以访问到服务器上的图片

以上就是关于“windows中怎么使用Nginx搭建图片服务器”这篇文章的内容,相信大家都有了一定的了解,希望小编分享的内容对大家有帮助,若想了解更多相关的知识内容,请关注创新互联行业资讯频道。
分享名称:windows中怎么使用Nginx搭建图片服务器
文章URL:https://www.cdcxhl.com/article12/gpisgc.html
成都网站建设公司_创新互联,为您提供虚拟主机、用户体验、全网营销推广、响应式网站、品牌网站设计、服务器托管
声明:本网站发布的内容(图片、视频和文字)以用户投稿、用户转载内容为主,如果涉及侵权请尽快告知,我们将会在第一时间删除。文章观点不代表本网站立场,如需处理请联系客服。电话:028-86922220;邮箱:631063699@qq.com。内容未经允许不得转载,或转载时需注明来源: 创新互联

- 如何维护成都网页设计公司的服务器? 2016-10-27
- 高端网页设计公司经验分享 2022-07-14
- 成都网页设计公司怎么去打造响应型网站? 2016-10-21
- 如何寻找专业网页设计公司 2014-01-09
- 网页设计公司提醒您网站外包需要提前沟通的问题 2022-05-05
- 成都网页设计公司:滚动型长页面怎么设计? 2016-11-02
- 网页设计公司如何选择,设计流程有哪些? 2016-11-09
- 成都网页设计公司有哪些特征? 2016-09-25
- 网页设计公司的网页设计原则 2016-07-06
- 什么样的网页设计公司最专业 2021-10-31
- 网页设计公司:网站建设应该如何提升用户体验度? 2016-10-08
- 网页设计公司怎样制作网页 2022-11-29